The 'How To' of Pebble Laying
This page is built particularly to help guide you in incremental steps to a perfect end result in laying your own pebble paving or resin bound sand as it has become known on TikTok.

Please follow these steps in their order

This step requires diagnosing the condition of the
substrate

Use KleenKote to degrease, rinse thoroughly and let dry properly.
(visit www.kote.co.za/kleenkote to download brochure) Watch video
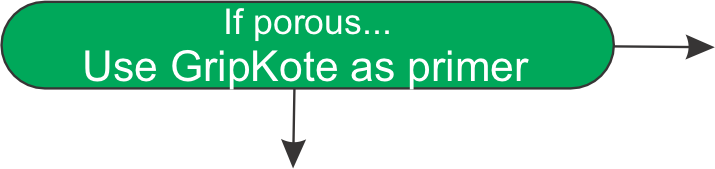
GripKote will seal the surface and provide a good rough primer to
lay pebbles. ( www.kote.co.za/gripkote.co.za ) Watch video

MortaKote mix will provide a smooth and level surface: Shape to drainage
point. ( www.kote.co.za/mortakote ) Allow to dry in good weather for 2 days)

Now that the surface is perfect we can proceed to lay pebbles.

Before rushing to mix and lay pebbles decide, where needed,
to affix the aluminium join strips and secure these to the floor.
Use AnchorKote to secure the strip to the floor, sets in 2 hours.

In order to achieve the optimum end results you will need to
use all the proper tools. An electric mixer machine or a drill
with spiral mixing attachment. A stainless steel flooring trowel.
A small bucket of water with rag. A 2mt aluminium straight edge.

When mixing pebbles with binder there are some critical
protocols to adhere to. When using the recommended 1.6mm
pebble, mix 7kg to 1lt of PolyKote. The mix should be
thorough and enough to spread about 2m2 so measure
14kg of stone to 2kg/lts of PolyKote and spread onto prepared
surface. If using bigger stones everything changes call us.

At last we are ready to get on our knees and lay pebbles! Be sure
to wear knee pads. Assuming you have checked that it will not rain
within at least three good hot days after you have laid your pebbles,
you can begin.
Spread mixed pebbles evenly over the surface and level with straight
edge between 3mm guages/aluminium strips. Watch video
Using a downward force and at a very small angle compact the pebbles
down onto the surface so as to achieve a smooth compact finish.
Do not stop spreading until you have reached the strip. If you leave the
spreading for even short time, it will harden and you will see the ugly join
for eternity.
Do not attempt to go back and smooth rough areas, it will make it worse, that
is the reason you need to follow the method to the T.
Do not mix and spread more than 2m2 at a time, the excess will harden in
the bucket and make it difficult to work with.
Only keep wetting the trowel and NOT the pebbles. If you wet the pebbles it
will dilute the binder on the surface and you will have loose pebbles later in time.
A lot of these instructions is given in good faith and it is assumed you have some
skill in working this type of physical manual labour. If not, it is wise to pay a contractor.